Especially if you are looking for compact kit, which you can use with little need for a tripod, the Olympus OM1 and 300mm PRO f4 in the OM System – now from OM Digital Solutions, as Olympus camera division was rebranded after being bought by Japan Industrial Partners – comprise a great combo for bird photography, including for birds in flight.
I’m relatively new to the OM1, but have been using Olympus [now OM Digital] gear since the early days of micro four-thirds aka M43 mirrorless systems: I opted for this kit partly for being compact and lightweight, relative to regular SLR cameras.
While I’ve always used the system for bird photography, as well as landscape shots and videos, the latest OM1 is a good improvement – even over the EM1.3, which I used just before this – for bird photography including challenging birds in flight. This is partly because of the enhanced autofocus system, with an option to search for birds as focus targets.
Basics; and often reacquiring focus
I’ve had the 300mm lens for longer, and this too is excellent. Typically, I used it together with 1.4x converter. I also have the 2x converter, but use this only rarely; it seems to need more “ideal” situations, such as shorebirds with good lighting.
Before noting settings, a little about technique once there’s a bird to try and shoot.
Though of course basic, it’s helpful to be able to point the camera and quickly get the intended bird in frame; and if it’s moving, also helps to be able to follow it, maybe as it flies. Takes practice, and yet important: for all the fancypants technology, the camera system will do better if a bird is reasonably steady in the frame.
Then, some advice I read and have found very useful: often reacquire focus, especially with birds in flight. Which for me means often pressing the shutter half way, and keeping an eye on where the frames to indicate the focus region/focus point are.
Shared settings
Used for all my bird photos:
- RAW – I first process the images with DXO PhotoLab; using RAW as there’s more latitude to play with in terms of contrast etc, than with jpeg.
- Image Review – off; no interruptions between shots.
- Metering entire frame
- Metering during sequential shooting: Yes – so exposure responds even if following bird moving from, say, shade to well lit area.
- Image Stabilizer: S-lS 1 – seems to work for me
- Sequential shooting Image Stabilizer: lS priority [so it favours stabilization, even if slower shooting speed]
- Lens I.S. Priority: Off – so can use both body and lens stabilization combined.
- Computational modes like Focus Stacking: Off – though I keep thinking I should try focus stacking…
- Bracketing: Off – again maybe should try these, such as Focus BKT; but typically there’s not time for such fanciness with bird photography.
- AF Mode: C-AF with MF assist – seems to work best, though I’ve read S-AF is most precise. With latter, maybe doesn’t cope so well as birds move, which is especially pronounced when flying of course.
- AF Area Pointer: On2
- Subject Detection: bird
- Eye Detection Frame: On – doesn’t work often, but seems worthwhile for the times eye is detected.
- Peaking Settings [for MF Assist]: Yellow, Normal – seems to me Yellow works pretty well for birds in most situations
Perched birds
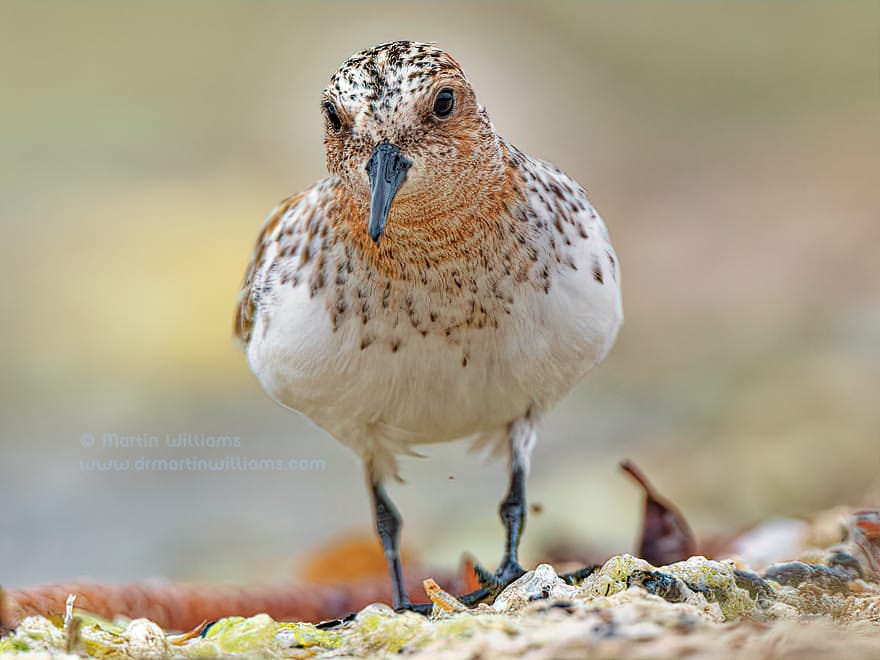
Compared to birds in flight, taking shots of birds that are perched or on the ground is relatively easy.
I have a custom setting (C1 on dial) for these situations; in brief:
ISO-A upper 2000
- ISO up to 2000 – even using DXO PhotoLab, I don’t like noise above this, if avoidable
- C-AF Sensitivity: 0
- C-AF Center Priority
- AF Scanner: On
- AF Target Mode: Middle
- Drive: sequential images – not using electronic shutter
Often, the autofocus indeed finds a bird, and can then even detect the head/eye to focus on. But not always: it can be confused if a bird is amongst branches; I also find this can happen with birds like pratincole, wagtail on short grass with focus switching between bird and background. In these cases, MF-Assist, with focus peaking, can be a boon.
While with previous gear, like film cameras, I couldn’t get sharp images at shutter speeds below perhaps 1/500sec – due to camera shake – the OM stabilisation pretty much removes this concern. I’ve taken handheld shots that are sharp at speeds as slow as around 1/50sec: when slow like this, I’m more concerned a bird might move a little than I am about camera shake.
While I’ve had some success using this mode for birds in flight – such as when birds I’ve been shooting have taken off, with no time to change mode – I have also taken some terrible shots of shorebirds in flight lately. Not sure why; had seemed camera was focusing ok, but blurry results. Will see if I can try again and do better.
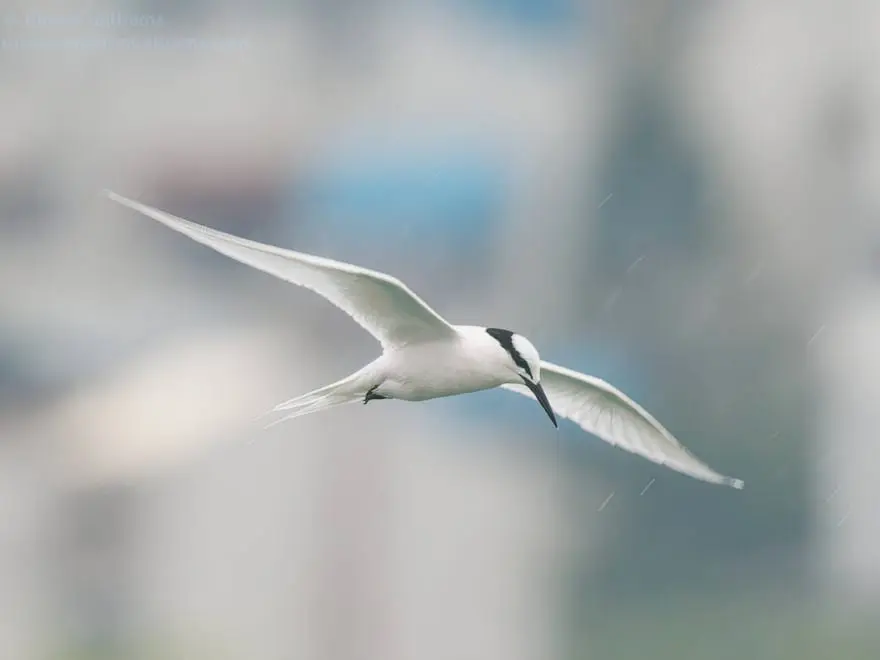
Birds in flight
As you’ll know if you’ve tried bird photography, capturing shots of birds in flight can be very challenging. Even getting shots of huge birds – such as storks and large birds of prey – can be difficult. But smaller birds are tougher still, including swifts and swallows.
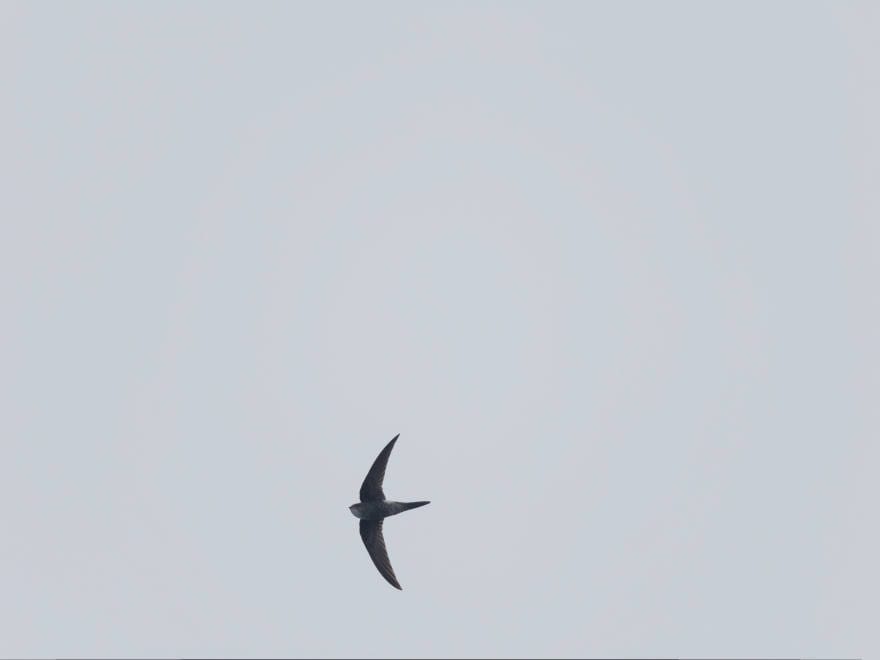
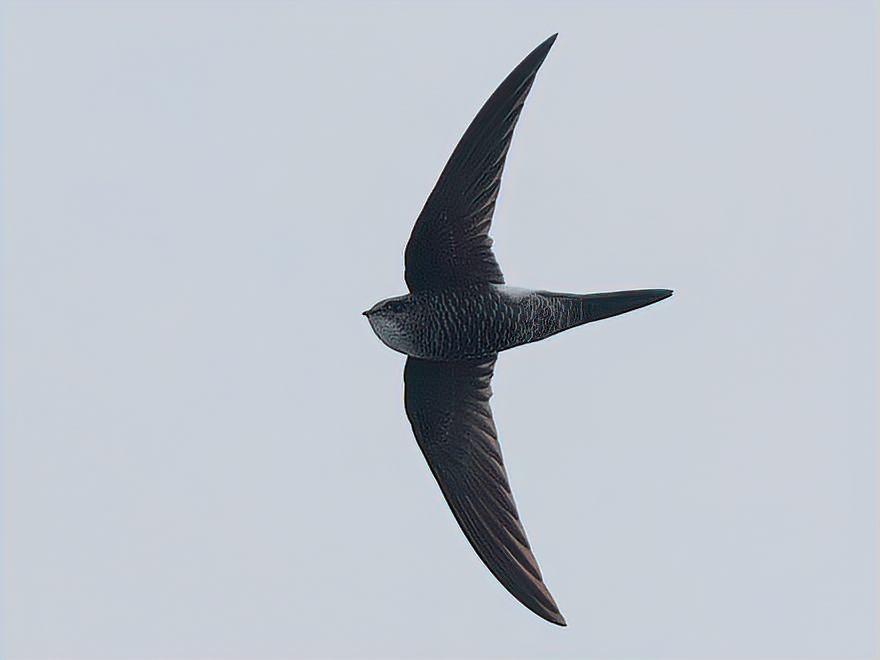
With close swifts and swallows, even getting one in frame long enough to acquire focus and take a shot is difficult – I have plenty of images with only part of a bird, or even no bird at all!
I learned of the EE1 Dot Sight being able to help in such cases: this is a gizmo that fits on the flash mount; and has a screen you look at along with the intended target. When a red dot on the screen and the target coincide, the target should be in frame. Well, I got one of these, and tried it but without being too impressed by the results; one problem being I sometimes take shots of birds that I find hard or impossible to see with the naked eye… Also, the need for calibration; I figured I might easily have it set a little wrong.
So for me, I favour relying on using the viewfinder screen to take aim at birds in flight (and as for those very distant birds – well, both for “record shots”, and sometimes to help with identification). As well as taking practice, for me this also requires some luck, such as a swift keeping to a predicted course for a very few seconds. And especially for smaller birds like these, higher success rate if just using the 300mm, no teleconverter.
I have a couple of custom settings for birds in flight; the only difference is that for one of these, I limit focus distance to around 5-200m, for times when swifts and swallows are close (not so often for me, including for spells when I’m on a hilltop watching for raptors and more passing over). Not very different to the settings for perched birds; main differences are:
- Drive mode: sequential with electronic shutter – currently 10fps; I have tried SH1 but just way too many images I thought, quite a hassle when editing.
- Image Stabilizer: Fps Priority – keep shooting even with stabilization for fewer shots; I think it helps to reduce shake, anyway, if panning camera to follow bird in flight
- C-AF Sensitivity: +1 – camera more ready to try and relocate subject to focus on, which should help when a bird is moving and I’m maybe having difficulty following it
- AF Target Mode: Large – so camera will look for a bird anywhere in the frame, though starting in centre; a boon for swallows, swifts etc that I find hard to get anywhere in the frame at all!
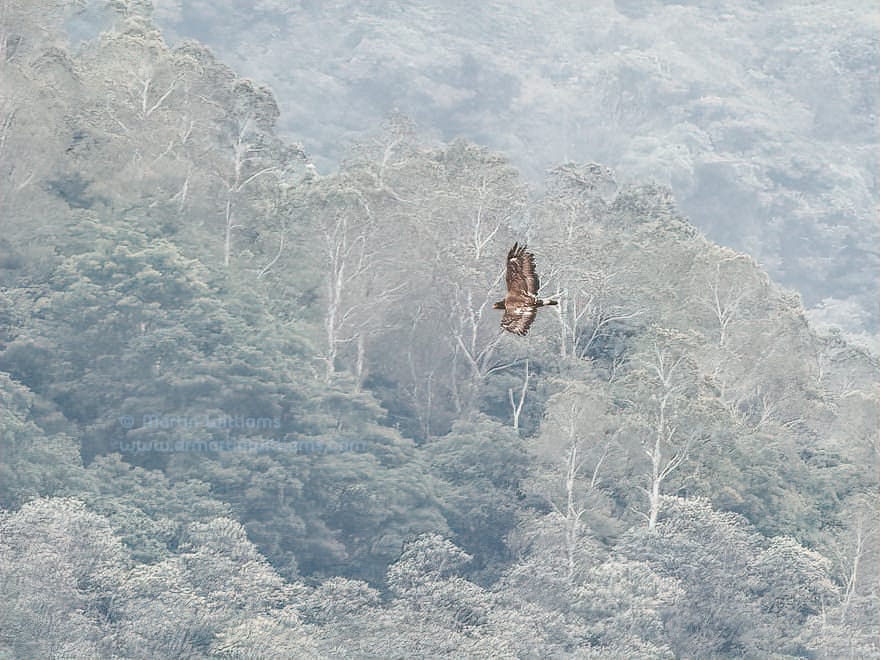
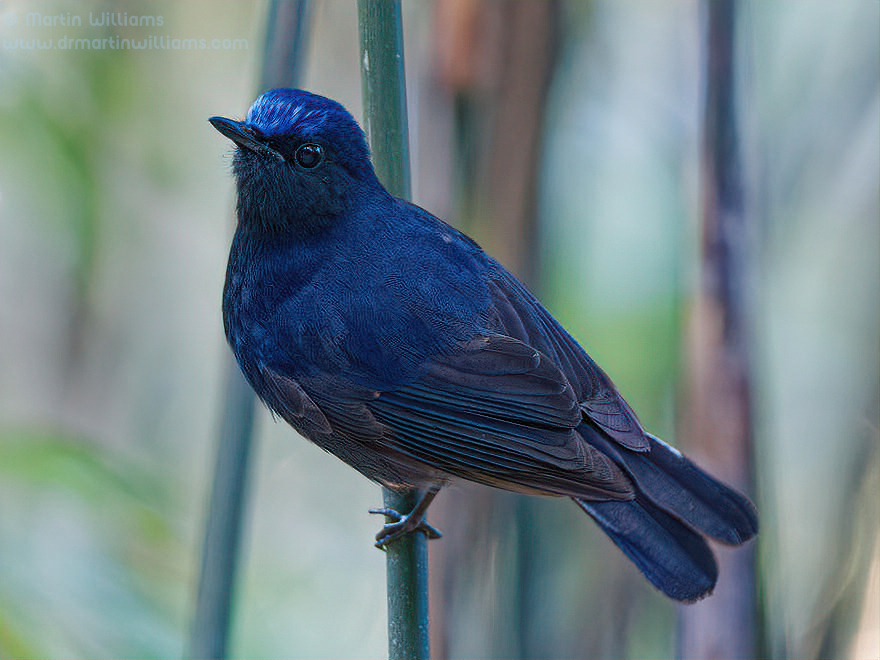
Bird photos taken with the OM1 and 300mm PRO lens, often with 1.4x converter


